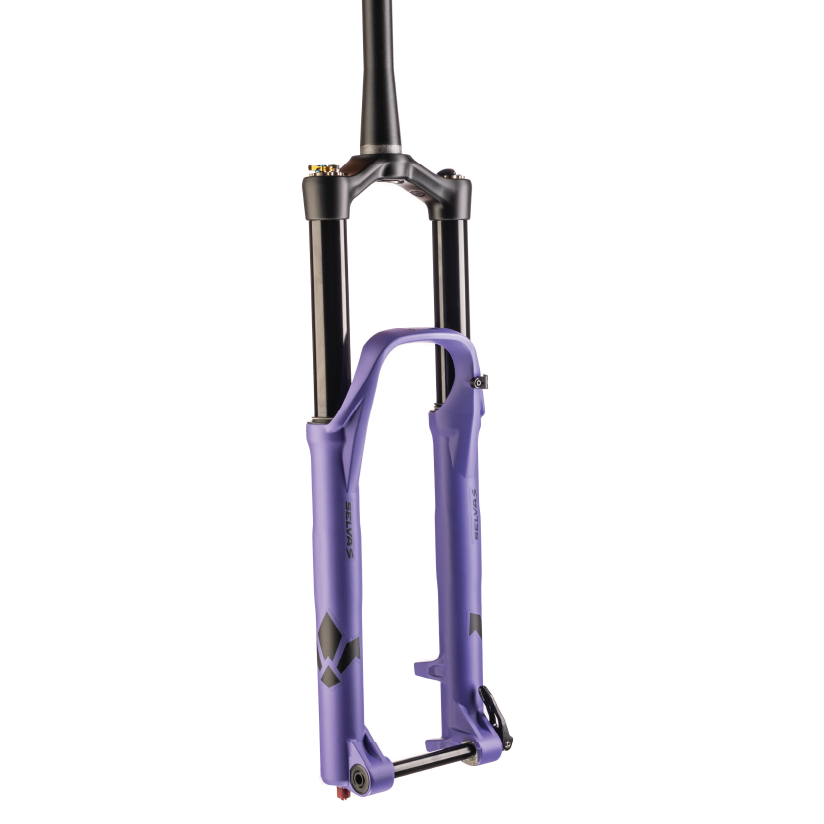
Updated Selva S
The Selva S has been updated with a low-progression air spring.
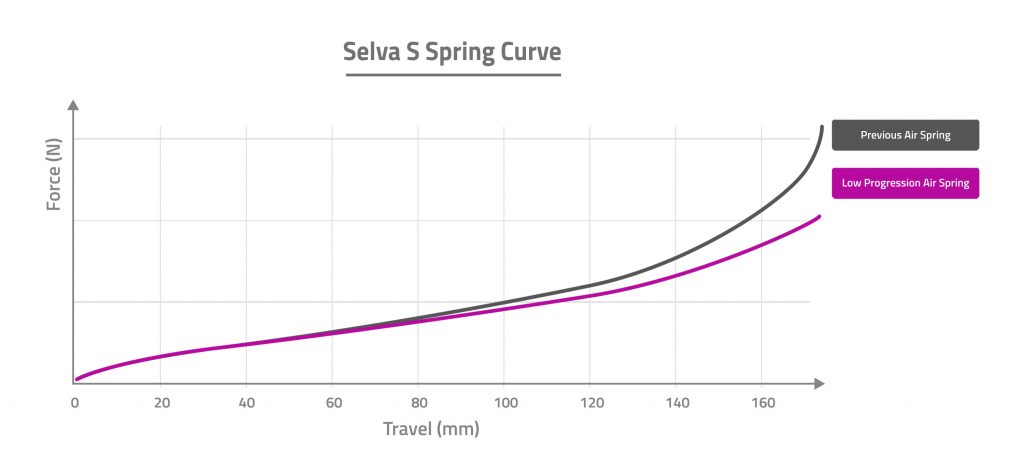
This low-progression air spring has a 10% larger volume positive air chamber than the previous air spring to make the spring curve more linear. A more linear spring curve makes it easier to use full travel and gives greater tuning potential.
Instead of relying primarily on the air spring for mid and end-stroke control, Neopos (sponge-like tokens that give mid-stroke support without abrupt ramp-up) and Compression Tuning System valves are used to control the fork throughout its travel.
This change comes through feedback from Josh Bryceland when developing his signature edition Selva. The low-progression air spring allows Josh to balance the air spring and the damper, enabling him to use the full travel of the fork while maintaining proper support.
These benefits aren’t just for pro riders – every rider can benefit from having a fork that is easier to get full travel from and has a wider range of adjustment.
The low-progression air spring is also available as an aftermarket upgrade and can be installed in any existing Formula fork, including the coil-sprung Selva C.
Selva S FAQs
Do all new Selva S forks come with the low-progression air spring?
Yes. However dealers may still have stock of forks that use the previous air spring.
How can I tell which air spring I have?
Release all the air from the fork using a Formula shock pump. Use the top cap socket tool, included with the forks, to remove the cap from the air side fork leg. Measure the distance from the top of the air chamber to the piston.
Low-progression air spring = 82mm
Previous air spring = 58mm
Will I need to change my settings from the previous air spring?
Not necessarily. Depending on your setup you may find that you are using more travel with the low-progression air spring, as it is more linear. If you want to increase progression, rather than adding air pressure, try adding a Neopos token. This will give more mid-stroke support while keeping the initial part of the travel supple.
I want more progression, can I fit the previous air spring?
Yes. The more progressive air spring is still available and can be installed. However, before doing that try adding Neopos tokens to the air chamber. This has the effect of increasing progression in a more controllable way.
Is it possible to fit the low-progression air spring to my older Selva S?
Yes. The low-progression air spring is fully retrofittable to all Selva S forks. This can be done by an authorized service center, or at home using basic workshop tools and those included with the fork.
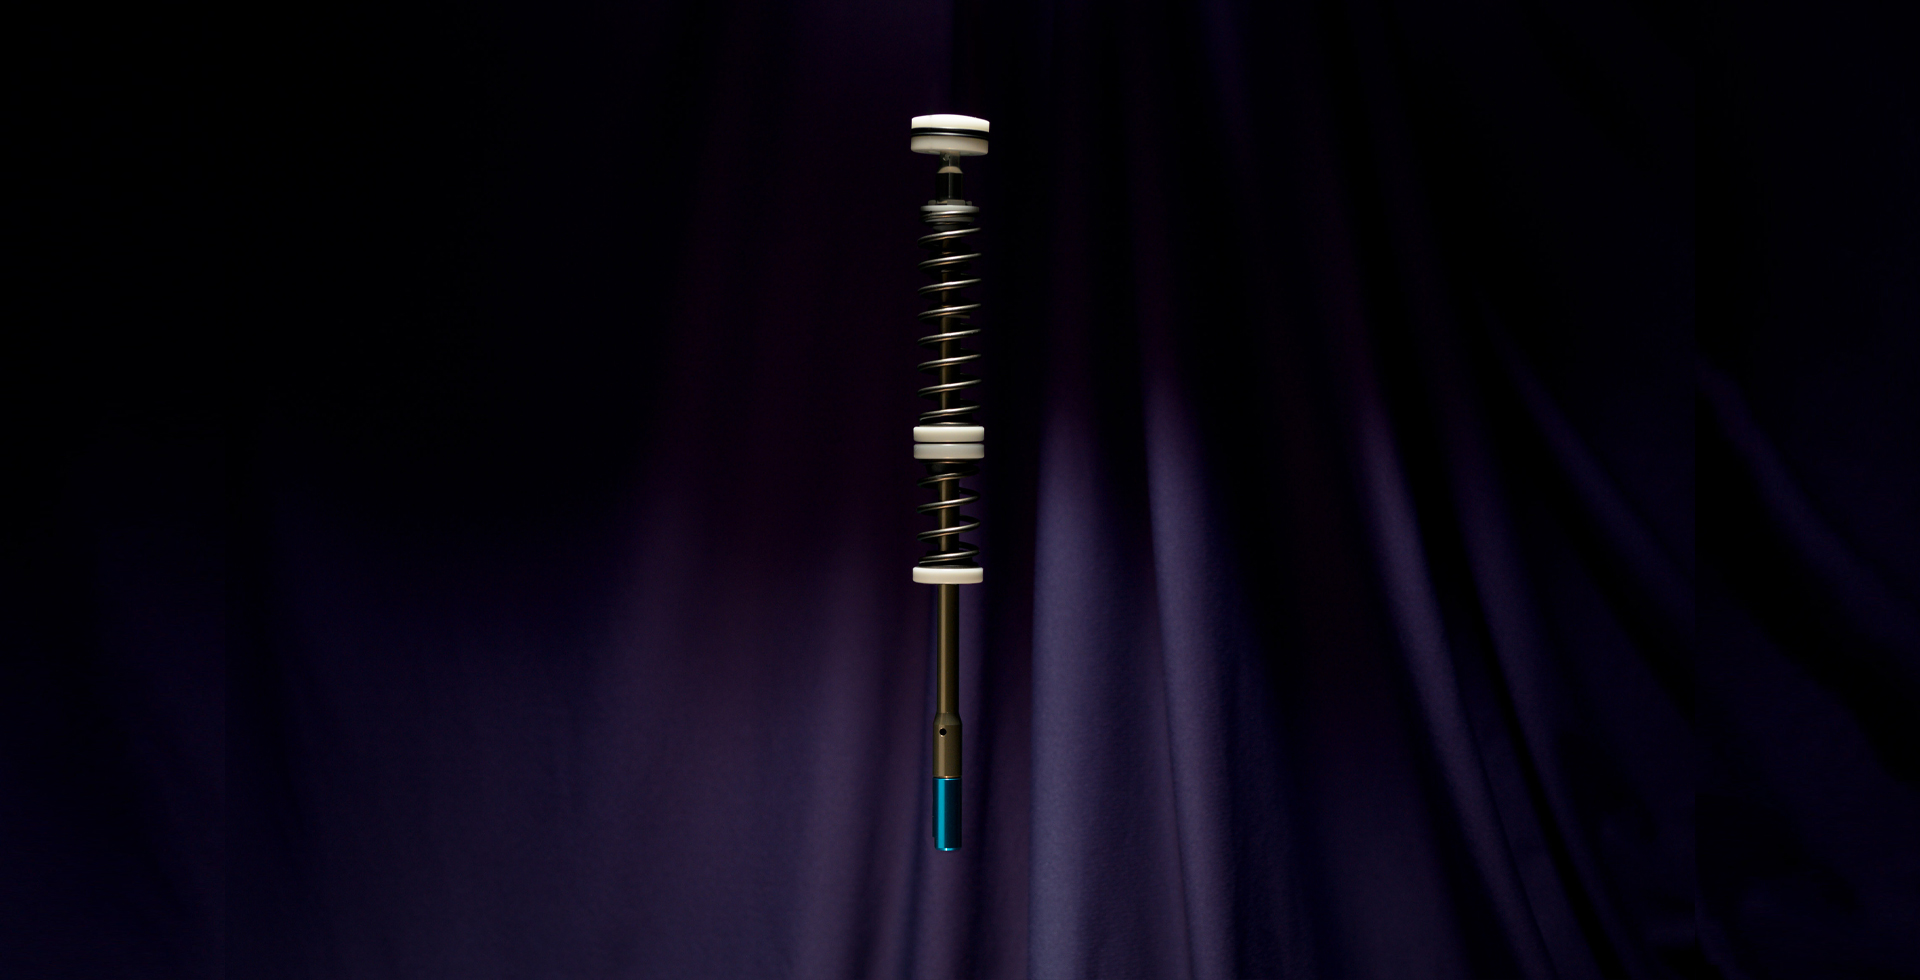
Fitting the Low-Progression Air spring
The instructions for changing the air spring are like those for changing the fork’s travel. This is covered in the Selva S manual. Instead of adding or removing travel spacers the piston assembly is swapped.
• Remove the air valve cap from the top of the fork.
• Attach a Formula shock pump to the valve. Reduce the air pressure to 0 (zero).
• Use a 10 mm socket wrench to remove the air valve.
• Turn the fork upside down and empty any oil present in the air cylinder.
• Remove the rebound knob by pulling it up.
• Use a 4 mm hex wrench to loosen the lock screws on the bottom of both fork legs.
• Remove the lower leg by pulling it up.
• Push the piston fully inside the cylinder.
• Remove the retention ring (circlip) with a small flat blade screwdriver.
• Remove the cap.
• Remove the piston and spring assembly from the tube.
• Install the new piston and spring assembly into the lower leg. The piston assembly should be at the same height as the cylinder.
• Install the cap into the lower leg with the larger circumference on top. Secure the cap with the retention ring (circlip).
• WARNING: Incorrect positioning of the retention ring (circlip) may cause the piston to escape suddenly when inflating, or subsequent use of the fork may cause serious or fatal accidents.
• Turn the fork upright and put 3cc of FORMULA FX oil into the air cylinder.
• WARNING: Before assembling, make sure the threads of the valve and cap are clean and degreased.
• Apply threadlock completely around the valve thread.